Bocce Court Kit Assembly Guide
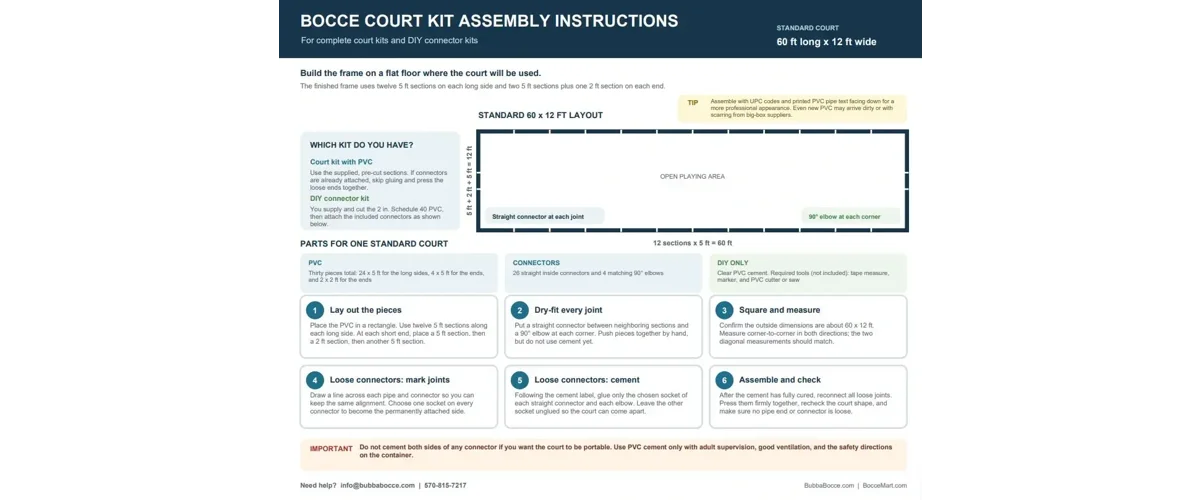
These instructions explain how to assemble a standard 60-foot by 12-foot indoor bocce court boundary. They apply to both a complete court kit with supplied PVC and a DIY connector kit using locally purchased 2-inch Schedule 40 PVC.
For a one-page layout diagram, complete parts list, and printable assembly instructions, open or download the PDF below.
View Printable Assembly Instructions PDF
Choose Your Kit Type
Court Kit With PVC
Use the supplied, pre-cut PVC sections. If the connectors are already attached, skip the cutting and cementing steps and press the loose ends firmly together.
DIY Connector Kit
Supply and cut your own 2-inch Schedule 40 PVC, then attach the included straight connectors and 90-degree elbows as described below.
Parts for One Standard 60 x 12 Foot Court
- 24 five-foot PVC sections for the two long sides
- 4 five-foot PVC sections for the two short ends
- 2 two-foot PVC sections for the centers of the short ends
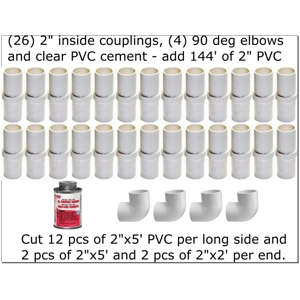
- 26 straight inside connectors
- 4 matching 90-degree elbows
DIY kits: Clear PVC cement is also needed. Required tools that are not included are a tape measure, marker, and PVC cutter or saw.
Assembly Steps
- Lay out the PVC. Place twelve five-foot sections along each long side. At each short end, place one five-foot section, one two-foot section, and another five-foot section.
- Dry-fit every joint. Place a straight connector between neighboring sections and a 90-degree elbow at each corner. Push the pieces together by hand, but do not use PVC cement yet.
- Square the court. Confirm that the completed frame is approximately 60 feet long by 12 feet wide. Measure diagonally from corner to corner in both directions. The two diagonal measurements should match.
- Mark loose connections. If your connectors are not already attached, draw an alignment mark across each pipe and connector. Choose one socket on every connector as the permanently attached side.
- Cement only one side. Follow the directions and safety warnings on the PVC cement. Glue only the chosen socket of each straight connector and elbow. Leave the other socket unglued so the court can be taken apart after play.
- Complete the assembly. After the cement has fully cured, reconnect all loose joints, press them together firmly, and recheck the court's shape and dimensions.
Appearance tip: Assemble the court with UPC codes and printed PVC pipe text facing down for a more professional appearance. Even new PVC may arrive dirty or with scarring from big-box suppliers.
Important: Do not cement both sides of any connector if you want the court to remain portable. Use PVC cement only with adult supervision, good ventilation, and all safety precautions listed on the container.
Need Help?
Email [email protected] or call 570-815-7217 with assembly questions.
 France
 Hebrew
 Spain
Spain Italy
Italy Germany
 Portugal